Migrating from Godaddy’s Office 365 email subscription to Microsoft 365 is a bit more complicated than a normal email system migration. This is because both systems are hosted by Microsoft and you can’t do certain things you would normally do during the migration, i.e. setting up the same domains on the Microsoft 365 account while the old one is still operating. Another issue is that Godaddy doesn’t give you full access to the underlying Office 365 admin portal and by default hides the Global Administrator account.
Below is an unofficial guide I successfully used to migrate a few of my clients from Godaddy to a new Microsoft 365 tenant. This is only feasible for smaller companies that don’t have lots of users and data. A very similar process can be used to untangle underlying Office 365 from Godaddy and keep using the same Microsoft tenant without Godaddy’s involvement. This has a couple of drawbacks, such as SharePoint site URLs looking weird, etc. but it may be a better option for larger companies.
In this case, however, we’ll be migrating from Godaddy to a brand-new Microsoft 365 tenant. Needless to say, use this at your own risk and have a proper backup before you proceed. I can’t guarantee that this will work in the future. If it doubt, speak to Godaddy and Microsoft.
- Set up a new Microsoft 365 tenant using a temporary .onmicrosoft.com domain.
- Create user accounts, groups, shared mailboxes, etc.
- Gain access to the real Godaddy’s Office 365 Global Admin account (it is not normally displayed in the user list).
- Login to https://portal.azure.com with GoDaddy’s Office 365 admin account.
- Navigate to Microsoft Entra ID > Users and reset the password for the account that looks something like: admin@NETORGFT9754997.onmicrosoft.com.
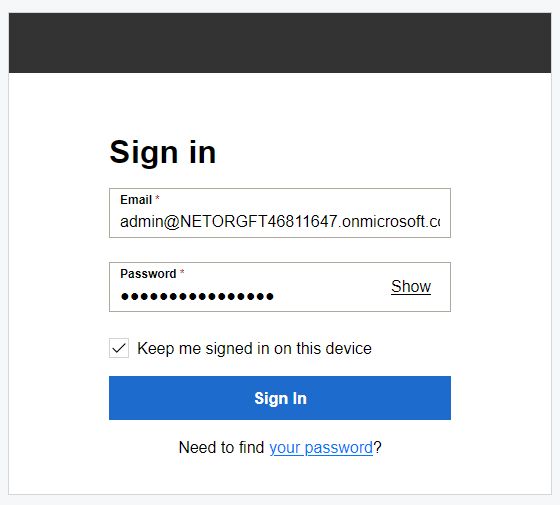
Log in to Microsoft 365 portal with this account using the temporary password and set up a new one.
- Now you have access to a proper Godaddy’s Office 365 Global Administrator account, but still can’t use a fully functional Office 365 admin portal as you will keep getting redirected to Godaddy’s login page.

To get around this, you need to de-federate your domain from Godaddy’s Office 365. - De-federation shouldn’t cause any issues, but at this point, it would be prudent to make a full backup of Godaddy’s Office 365 data. In my case, I also set up all user accounts in Outlook’s cached mode and made sure all emails were downloaded to local .ost files. Keep this open, so any new emails get downloaded before we do the final export into PST files.
- De-federate your domain from Godaddy:
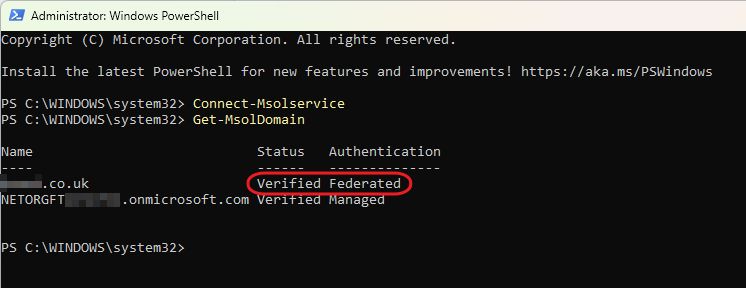
- Open PowerShell as admin, run: Connect-Msolservice and log in using the global admin account we just gained access to (admin@NETORGFT…).
- Run: Get-MsolDomain to verify that the domain is federated:

- To remove federation, run Set-MsolDomainAuthentication -DomainName “domain_name.co.uk” -Authentication Managed.
- Run: Get-MsolDomain again and verify that the domain is now “Managed”.

- Log in to https://admin.microsoft.com with admin@NETORGFT… Global Admin account and verify that you now have access to the full Microsoft 365 admin portal functionality (Domains, User Passwords, Partner Relationship, etc.). If you are still getting redirected to Godaddy’s login page, try a different browser, clear your browser cache, or just wait 10-15 minutes.
- Log in to GoDaddy’s admin portal (https://www.godaddy.com) and change your domain(s) DNS MX records to an invalid target (i.e. unreachable.mydomain.com). This will queue incoming emails on most sending servers for up to 24 hours.
- If you haven’t exported old mailboxes into PST files yet, this is a good time to start it as no new email should arrive anymore.
- Login to the old Godaddy’s Office 365 admin portal and remove all your custom domains. Sometimes this works automatically, sometimes you need to manually change all users’ aliases to the default MS domain.

- In the new Microsoft 365 admin portal, add the same domains back and verify ownership (via DNS TXT record). Skip MX record verification for now.
- Set the correct domains for all users as their primary email, configure aliases, shared mailboxes, etc.
- If you are getting an error “You can’t use the domain mydomain.com because it’s not an accepted domain for your organization“, just give it 10-20 minutes.
- In Gadaddy’s admin panel fix the DNS MX record and verify it in the new Microsoft 365 tenant.
- Import old mailbox PST files into the new accounts.
- Users can start using the new mailboxes in webmail straight away, but you may need to wait a little while before you can add them to MS Outlook. When setting them up on the same PCs where old ones were configured may hit some issues.
- Login to Godaddy > Renewals and Billing and cancel Microsoft 365 email services.
- Until the old Office 365 subscription gets completely disabled, you can still log into the old accounts using the leftover NETORGFT…..onmicrosoft.com domain.
Last performed in January 2024.

Leave a Reply