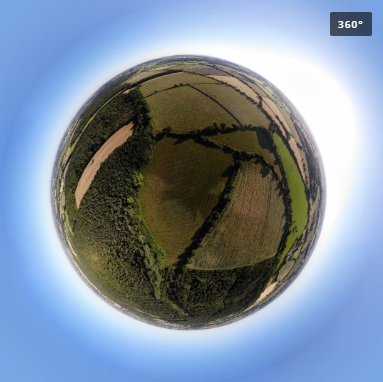
DJI Mavic Air can generate 360 degree panoramas automatically, unfortunately quality of image stitching is far from perfect and often leaves visible blurring and artifacts in areas where images were joined. After a bit of experimenting I settled on the following process.
- Copy original panorama source images from SD card (DCIM\PANORAMA) to your PC.
- If your images are in RAW (.dng) format, convert them to .jpg first. This step is important. ICE will try to make panorama from .dng, but it doesn’t fully support the format and resulting panorama will be very poor quality.
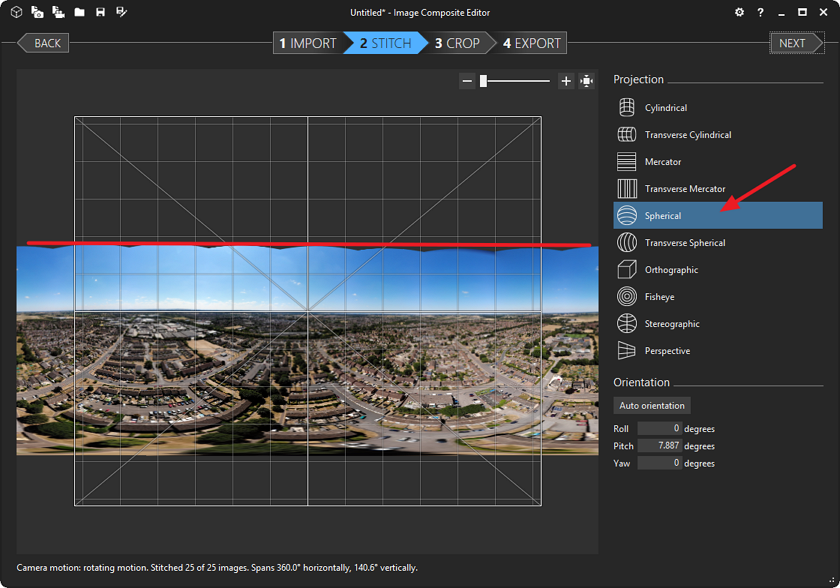
- Launch Microsoft ICE (can be downloaded for free from here) and click on New Panorama From Images.

- Complete a simple wizard and create the panorama. All default settings should be fine, just make sure you choose Spherical panorama and straighten horizon line if necessary.
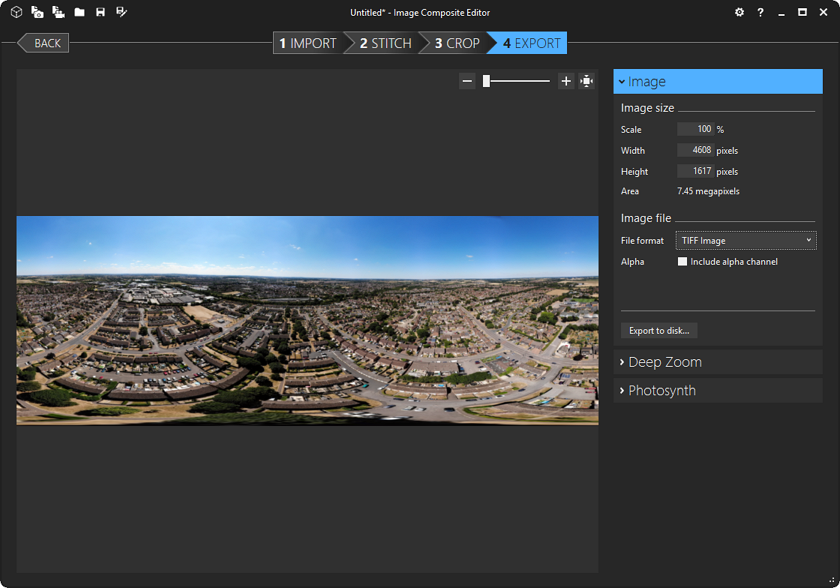
- Auto crop and finally export the image. I use TIFF format to prevent any quality loss during following editing, but JPG will work fine as well.
To make your panorama work with online services such as Facebook, Google Photos, and SkyPixel you need to make two additional changes to your panorama:
- Change aspect ratio to 2 x 1
- For this I Photoshop Elements, but any other image editor will do the job.
- Go to Image > Resize > Canvas Size and set Height to be exactly half of the Widh. Click on arrow down under Anchor and set Canvas extenstion colour to White.
If Width is an odd number got to Image > Resize > Image Size and reduce the width by 1 pixel.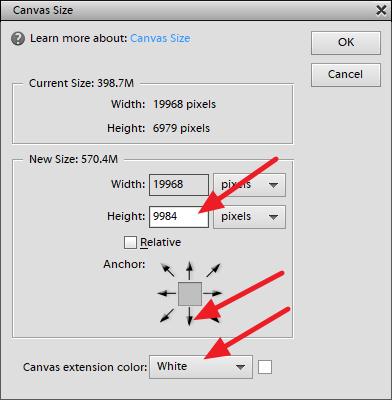
- Your image now will look like this:
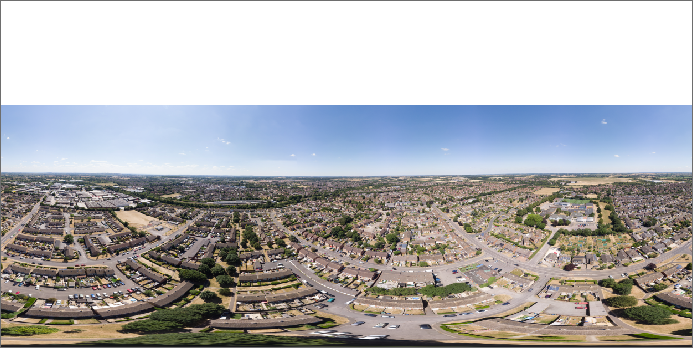
- There are few ways to fill the white space.
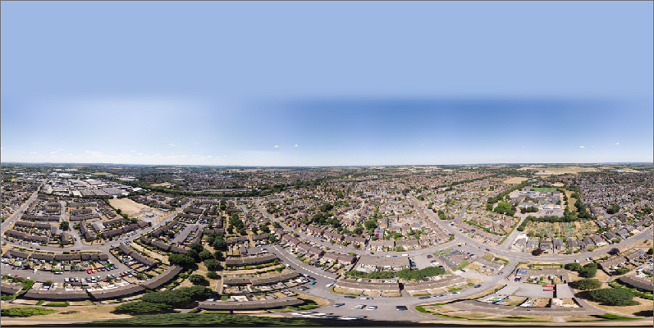
- The simplest option is to fill the white space with colour similar to the sky colour and then use Gaussian Blur filter to blur the gap (Filter > Blur > Gaussian Blur). This is how this looks:
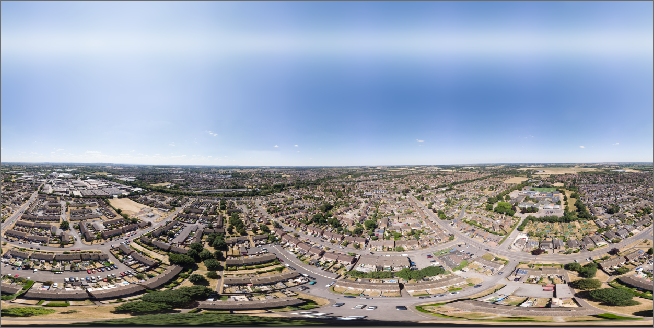
- Slightly better result can be achieved by copying very top of the sky into a new layer, then flipping it vertically (Select the Layer then Image > Rotate > Flip Layer Vertical) and placing it right where the real sky ends. If this doesn’t cover whole white space you will need to add another copy of the same new layer (this time not flipped). You may also need to apply some Spot Healing and Gaussian Blur tools to get rid obviously repeating elements (clouds, etc.). Here is the result:
- The simplest option is to fill the white space with colour similar to the sky colour and then use Gaussian Blur filter to blur the gap (Filter > Blur > Gaussian Blur). This is how this looks:
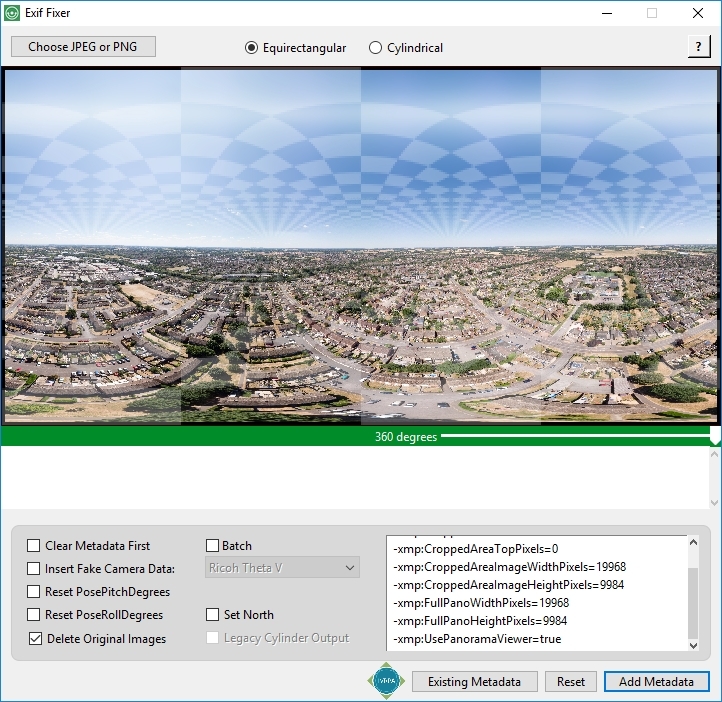
- Add 360 degree panorama EXIF tags
- Easiest way to do this is to use online service https://nadirpatch.com/exif/. Simply upload your emage and then re-download with EXIT tags added. Be aware that the largest image you can upload to this service is 20MB.
- If you deal with images larger than 20MB or just prefer offline tools, download Exif-Fixer from http://panoramaphotographer.com/software/exiffixer/. It’s free, installation is not required, and you can inspect and adjust the EXIF tags before saving the final panorama.
July 2018
DJI Mavic Air
Windows 10
Lightroom 6
Photoshop Elements 12
Exif Fixer
Leave a Reply