I develop few Android apps during my spare time and until now I have been syncing project folders between my Synology NAS and PCs/Laptops using excellent Beyond Compare. Finally, I decided to get a bit more sophisticated and started using Subversion (SVN) to sync and track my dev projects.
It’s been quite some time since I last used SVN, so this may not be the most efficient way to set everything up, but here it is:
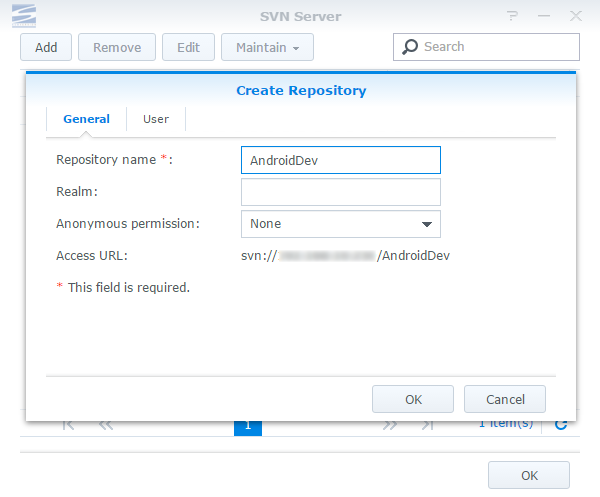
- Install SVN Server. You can choose any flavour you want. In my particular case I used Synology NAS version.

- Setup your your repository and add user(s).
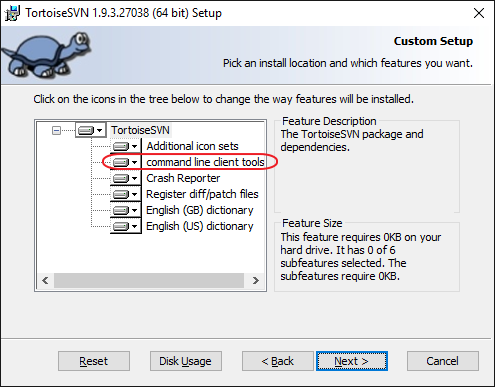
- Install SVN Windows client. I went for TortoiseSVN. During installation enable option to install command line client tools (by default this is disabled).
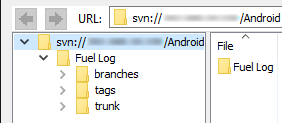
- Using TortoiseSVN Repository Browser login to your repository and create folder structure. I want for standard branches – tags – trunk.
- Using Windows File Explorer navigate to your Android Project location. Create a backup copy of the project folder (just in case). Then delete all files and folder that you don’t want to upload to version control. I normally exclude all IDE files that can be automatically generated (although some sources argue that certain IDE files should be included). Anyway, here is my list:
- Folders:
- /.gradle
- /.idea
- /app/build
- /build
- /gradle
- Files
- gradlew
- local.properties
- *.iml (there should be 2 .iml files, one in project root directory, second in app subfolder)
There are other ways to exclude files from SVN before import (for example import in place) but none of these methods worked well for me. Deleting before importing was the most reliable approach.
- Folders:
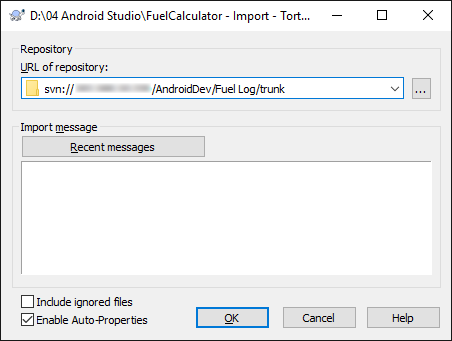
- Right click on the project root folder and from the context menu select TortoiseSVN > Import. Select the correct SVN folder you are importing to and click OK. Files will be uploaded to the SVN repository.
- Right click on the project root folder again and this time select SVN Checkout. Make sure Checkout Directory is pointing to your project’s root folder and Depth is Fully Recursive. Ignore warning about checking out to a non-empty directory.
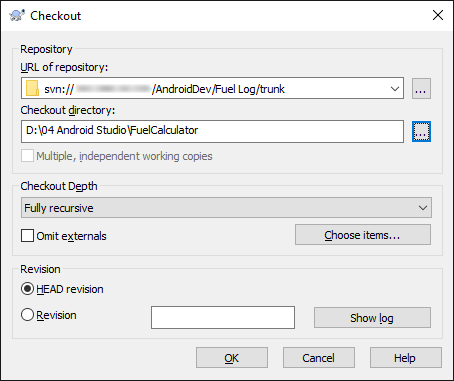
All of your checked out files should have green check marks and there should be hidden .svn folder inside the project’s directory.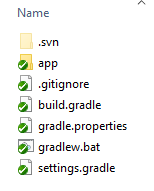
- Now open Android Studio and from Quick Start menu select Import project.

- Select your project folder and click OK. Next dialog will offer to automatically download and configure Gradle. Click OK.
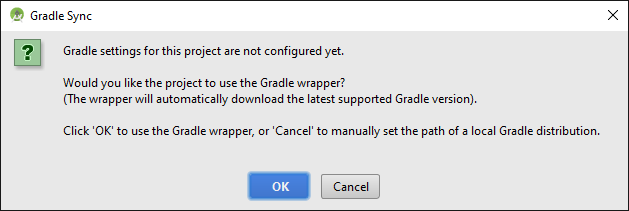
Once Gradle sync finishes, build and run the project to make sure all IDE files and generated properly. - Go to File > Settings > Version Control > Subversion.
Enable Use command line client: svn option. All other checkboxes should be disabled.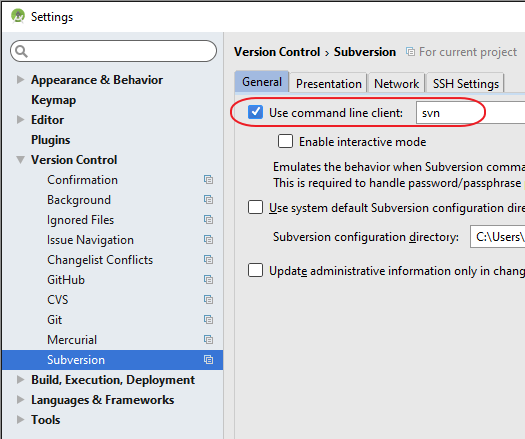
If this option is not selected, Android Studio will use its own svn client. In my case it was too old to (v1.7) and could not communicate with SVN v1.8 working copy. - Go back to the project directory using File Explorer and from TortoiseSVN context menu exclude all auto-generated files and folders. Basically it should be the same files you deleted in step 5 (they don’t have green check marks in File Explorer so are very easy to spot).
It’s possible to configure exceptions directly in Android Studio.I don’t like this approach because it is client side exception list and would need to be repeated on all devices. TortoiseSVN ignore list is server side and only needs to be done once for every project.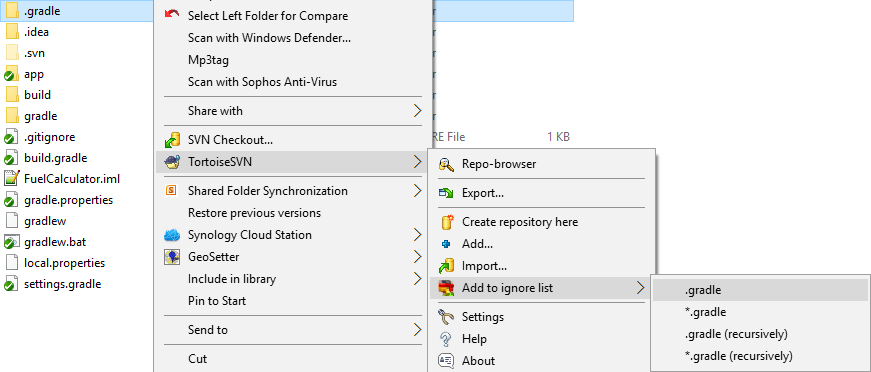
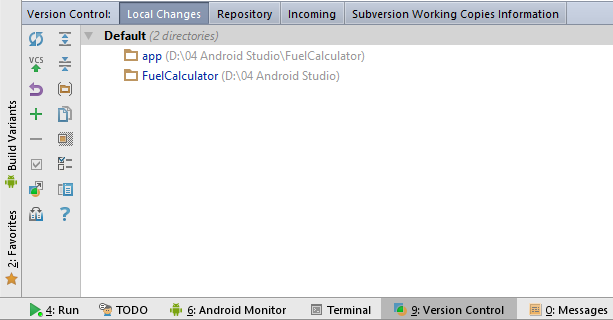
All .iml filles can be excluded via single entry: *.iml (recursively). - Go back to Android Studio and check Version Control > Local Changes tab. There should be no unversioned files. Two directories appears as changed because exclusions that we just added are saved in folder properties.
- Commit changes and you should be good to go. From now on you can commit and update the project from Android Studio (although you can also use TortoiseSVN if you wish so).
To checkout the project on another device, in Android Studio Quick Start select Check out project from Version Control > Subversion. Cancel the prompt offering to open the project immediately after checking out. Instead Import it so Android Studio can generate gradle and other IDE files.
Android Studio 1.5.1
TortoiseSVN 1.9.3
Leave a Reply