This article explains how to add a Netgear ReadyNAS Business Pro share to a VMware ESXi host as an NFS (Network File System) datastore. Although I’m using Netgear RadyNAS in this example, similar process would apply to any other NFS compatible NAS device.
Netgear ReadyNAS Pro device
- Login to RadyNAS Pro admin interface
- Go to Services > Standard File Protocols and enable NFS service
- Go to Shares > Share Listing
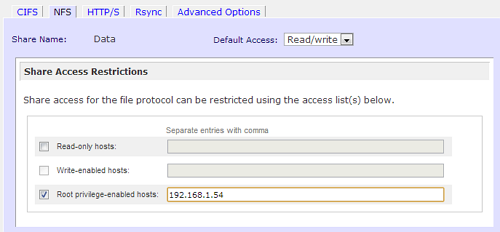
- Click on NFS icon next to the share you want to use
- Enable required Default Access level
- Select Root privilege-enabled hosts and enter IP address of your VMware ESXi host

VMware ESXi host
- Login to your VMware vSphere Client
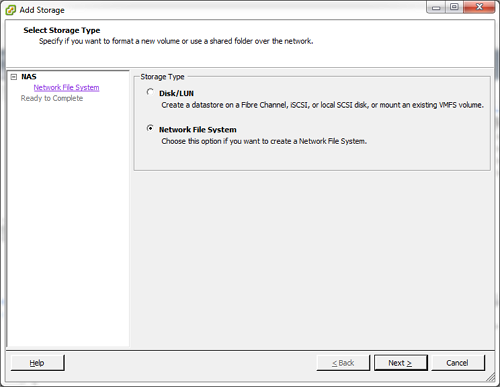
- Go to Configuration tab, select Storage and click on Add Storage
- Select Network File System and click Next

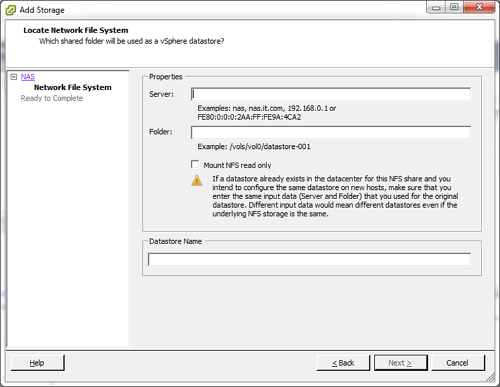
Server: Enter your Netgear ReadyNAS host name or IP address
Folder: Enter share name in format /c/Share-Name i.e. /c/Data
Optionally check Mount NFS read only
Enter Datastore Name as you want it to appear in VMware list of datastores
- Click Next and Finish
Troubleshooting
If you get following error:
NFS mount <server-name>:<share-name> failed: The mount request was denied by the NFS server. Check that the export exists and that the client is permitted to mount it.
Double check that in VMware Add Storage wizard Folder field you entered share name in format /c/share-name and not just share-name
Make sure you entered correct IP VMware host IP address in Root privilege-enabled hosts on Netgear ReadyNAS
VMware ESXi 5.1
Netgear ReadyNAS Business Pro

Leave a Reply